Creating a beautiful garden doesn’t have to be complicated or overwhelming, especially if you’re a beginner. I put this post together because I know how tempting it can be to dive into gardening, only to feel lost when it comes to building your own planter boxes. If you want to elevate your outdoor space with some charming planter boxes but don’t know where to start, you’re in the right place. Whether you’re working with a tiny balcony or a small backyard, I’ve got you covered with plans that anyone can tackle.
If you’re someone who loves the idea of planting flowers or herbs but feels intimidated by construction, this guide will make it simple for you. You’ll find easy-to-follow designs that require minimal tools and skills. These projects are perfect for those just stepping into the world of DIY planter boxes. I’ve gathered seven creative and practical designs that not only beautify your space but also give you a sense of accomplishment.
Get ready to dig into these straightforward planter box plans that are budget-friendly and beginner-friendly. You’ll learn how to craft unique structures like stacked wooden planters, ladder planter boxes, and even vertical pallet gardens. By the end of this post, you’ll have the confidence to create your own outdoor oasis, regardless of your previous experience.
Key Takeaways
– Beginner-Friendly Designs: Each planter box plan is tailored for beginners, requiring simple materials and basic tools.
– Space-Saving Solutions: The designs focus on vertical gardening, making them ideal for small spaces like balconies or patios.
– Variety of Styles: From stacked wooden planters to hanging boxes, there’s a style to suit every taste and gardening need.
– Step-by-Step Guidance: Clear instructions accompany each plan, ensuring you can follow along easily and successfully.
– Enhance Your Garden: Building these planter boxes not only beautifies your outdoor area but also allows you to grow your favorite plants with ease.
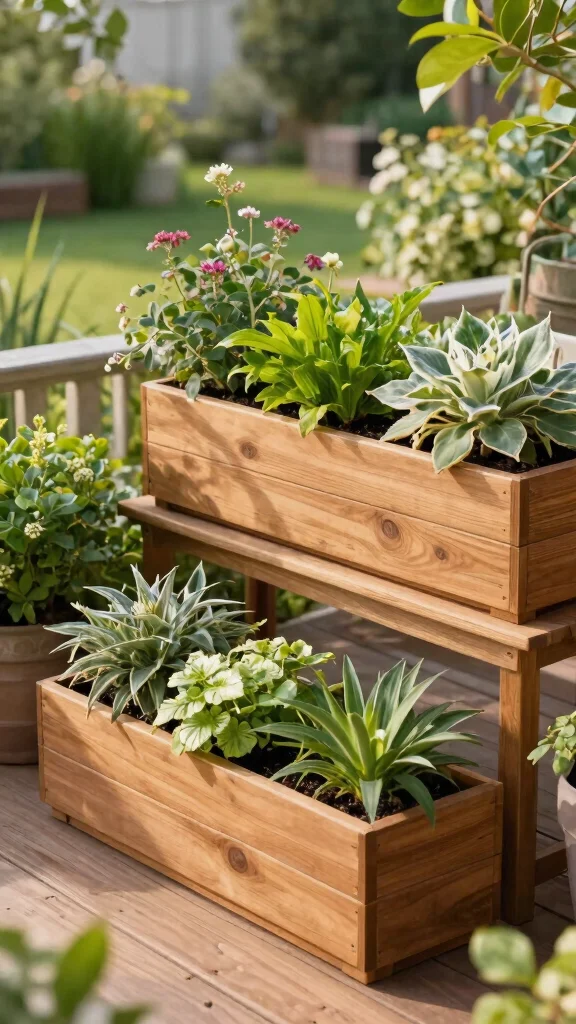
1. Stacked Wooden Planters

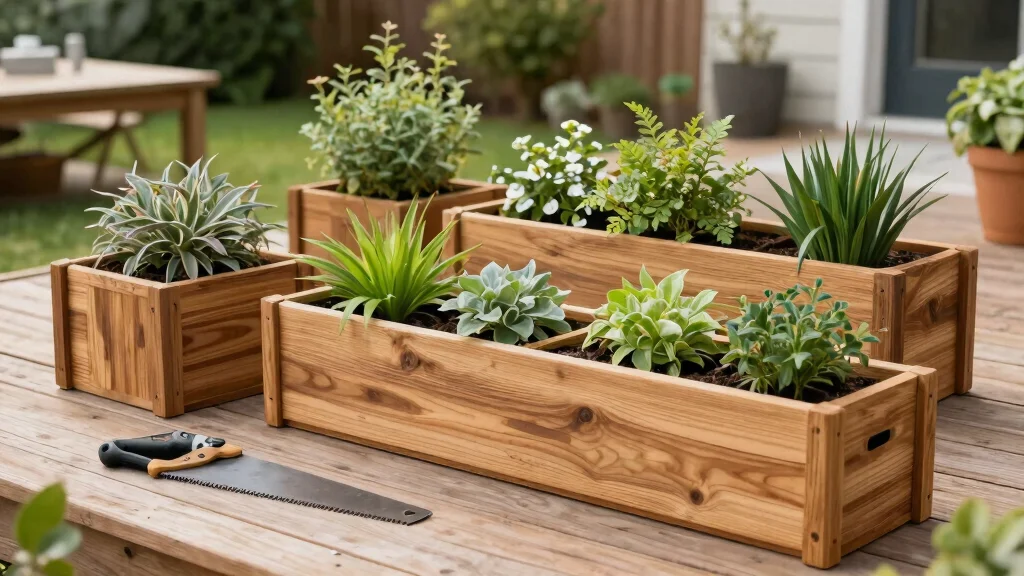
Looking to maximize your gardening potential in a small area? The stacked wooden planters design is perfect for you. This vertical approach allows for a diverse array of plants, all while saving precious ground space. Imagine fresh herbs like basil and cilantro or bright flowers adding life to your patio or balcony. Each tier can be customized, offering versatility in design and functionality.
Start by determining the height that fits your space and consider painting or staining the wood to complement your outdoor aesthetics. Building your stacked planter box is straightforward and rewarding.
Key steps to get started:
– Choose durable cedar wood for longevity.
– Cut wooden boards into uniform sizes for easy assembly.
– Ensure proper drainage by drilling holes at the bottom.
– Position in a sunny spot for optimal plant growth.
Completing this project will not only enhance your outdoor setting but also provide easy access to fresh herbs right at your fingertips!
Turn a small balcony into a thriving herb garden with stacked wooden planters. These simple planter box plans let beginners stack herbs and blooms vertically, saving ground space while delivering fresh basil, cilantro, and color.
Difficulty Rating & Requirements
Overall Difficulty Rating: Easy
Building planter boxes from our plans is rated as easy. This activity is perfect for beginners who want to dive into DIY gardening projects. If you’re just starting, these plans require minimal skills and tools, making them accessible for everyone.
Time Estimate:
⏱ Estimated time: 2-5 hours depending on the design chosen.
– Preparation: 30 minutes for gathering materials and tools.
– Construction: 1-3 hours depending on the complexity of the planter box design.
– Finishing Touches: 30 minutes for painting or sealing, if desired.
Skill Requirements:
– Required skills: Basic woodworking skills, measuring, and assembly techniques.
– Beginner-friendly: Yes, this project is designed for those new to woodworking.
– Skills that can be learned: Using a saw, drilling holes, and basic measuring can all be picked up during this project.
– Skills requiring experience: Advanced joinery or intricate designs may need more advanced woodworking knowledge.
Tools & Materials Needed:
🧰 Essential items checklist:
– Wood (1×6 or 1×8 boards) – Required
– Wood screws – Required
– Drill – Required
– Saw (handsaw or power saw) – Required
– Measuring tape – Required
– Sandpaper – Optional, but recommended for a smooth finish
– Wood stain or paint – Optional, for aesthetic or protection purposes
– Level – Optional to ensure evenness
Step-by-Step Overview:
1. Planning and Measuring (30 minutes): Decide on the design and size of your planter box. Measure and cut the wood to the desired dimensions.
2. Assembly (1-3 hours): Follow the plan to assemble the box. Use wood screws to secure the pieces together. Ensure everything is aligned properly.
3. Finishing (30 minutes): Sand the edges to avoid splinters. If you wish, apply paint or stain. Allow it to dry before using the planter.
Professional vs DIY: On average, hiring a professional to build a similar planter box can cost between $200-$600, depending on size and materials. In contrast, you can build your own for about $50-$150. If you enjoy working with your hands and want to save money, tackling this project yourself is a great choice. If you’re unsure or have complex designs in mind, consider reaching out to a professional for assistance.
Stacked Wooden Planters
Editor’s Choice

Back to the Roots 100% Organic Potting Mix (Value 12 Quart) | Premium Bl…

Yaheetech 8×2ft Wooden Horticulture Raised Garden Bed Divisible Elevate…

Garden Tools Set, 3 Pack Heavy Duty Gardening Tools Set Include Garden S…
2. Ladder Planter Box
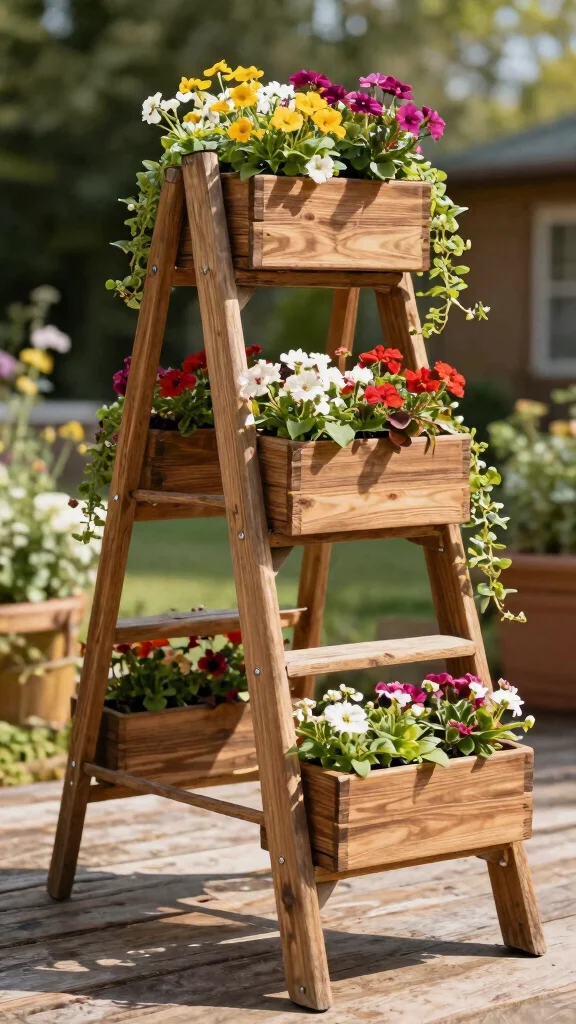
Ready to breathe new life into an old ladder? Transform it into a delightful ladder planter box that adds character to any space. This unique design elevates your plants and creates a stunning display. Attach small planter boxes to the ladder rungs and let trailing plants like ivy or petunias elegantly cascade over the edges.
To get started, find an old ladder or purchase a sturdy new one. Secure wooden boxes to each rung using screws or brackets for a sturdy hold.
Here’s how to create your ladder planter:
– Repurpose an old ladder for a rustic look.
– Attach small wooden boxes securely for planting.
– Select trailing plants and vibrant flowers for variety.
– Paint the ladder a bright color for a cheerful touch.
Once completed, your ladder planter box will not only be practical but also serve as a charming feature in your garden!
Ladder Planter Box
Editor’s Choice

Wensilon #10 * 3″ Deck Screws, (137pcs) 2 lbs.Exterior Wood Screws, Rust…

6 Step Ladder for 12ft High Ceiling, Lightweight Aluminum Folding Step S…

Yaheetech 43.5″ L×16″ W×14″ H Wooden Raised Garden Bed, Horticul…
3. Vertical Pallet Garden

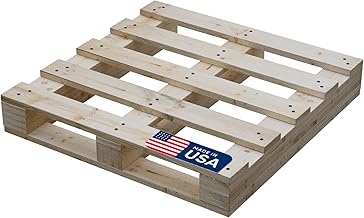
Looking for a sustainable way to garden in limited space? A vertical pallet garden is your answer. Using an old wooden pallet, you can create a striking vertical planter that holds a variety of plants in a compact area. Prop the pallet against a wall or fence, fill it with soil, and choose your favorite plants—flowers, herbs, or succulents.
Start by sourcing a clean, safe pallet and sand down any rough edges for safety. After securing any loose parts, fill it with landscaping fabric and soil.
Here’s how to build your vertical pallet garden:
– Source a clean pallet suitable for planting.
– Prepare by sanding rough edges for safety.
– Fill with soil and plants after laying it flat.
– Install upright against a wall for stability.
This fun project not only beautifies your space but also promotes eco-friendly gardening using materials you already have!
Fun fact: vertical pallet gardens can triple your growing space in tiny yards, using just a pallet and some soil. It’s one of those practical planter box plans that turns blank walls into green, thriving herb and flower spots.
Vertical Pallet Garden
Editor’s Choice
Treaton, Heavy-Duty 2-Way Entry Wooden Pallet – 31x24x5”, Industrial…

Grenebo Gardening Tools 9-Piece Heavy Duty Garden Hand Tools with Fashio…

Premium Potting Soil Mix with Peat Moss, Vermiculite, Perlite (Made in U…
4. Tiered Planter Box
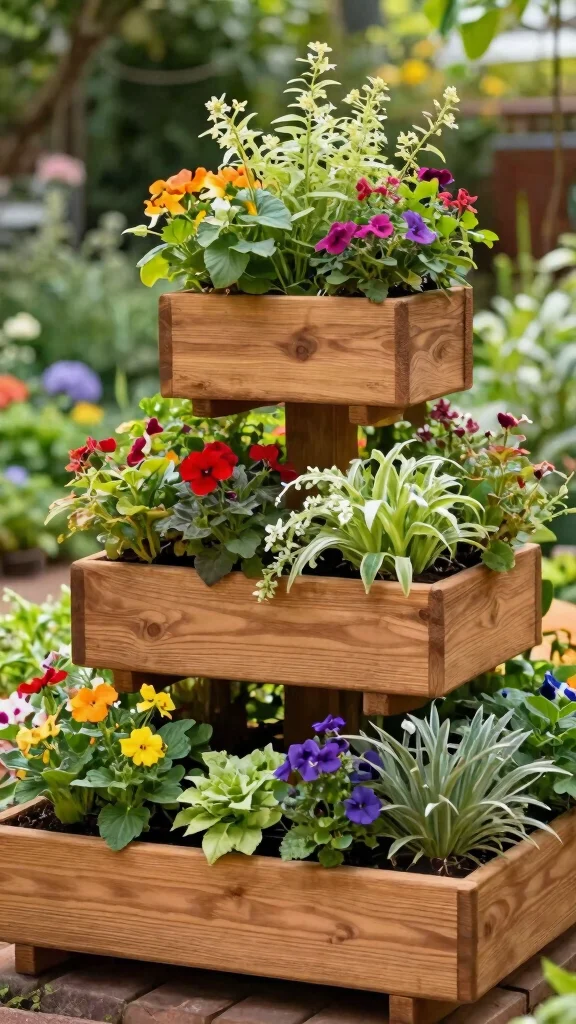
Want to create a stunning visual effect in your garden? The tiered planter box design is your solution. This layout maximizes planting space while offering distinct levels for different plants. Perfect for flowers or vegetables, each tier can cater to varying sunlight and water needs.
To build a tiered planter box, start with a rectangular base and construct steps for each level. Choose sturdy wood to ensure it can support the plants and soil.
Here are key steps to get started:
– Construct a rectangular base with steps for tiers.
– Select strong wood to support the weight.
– Stagger the heights for a visually appealing arrangement.
– Place in a sunny area for adequate light.
This planter not only fulfills functional needs but also enhances the beauty of your outdoor space!
📹 Related Video: DIY Tiered 5 box planter- Low Cost High Profit – Make Money Woodworking
Tiered Planter Box
Editor’s Choice

Woodworking for the Garden: 16 Easy-to-Build, Step-by-Step Projects (Cre…

Halatool Railing Planter Box Brackets Outdoor, 4 Pack Adjustable Flower …

Miracle-Gro Organic Outdoor Potting Mix – Plant Soil for Outdoor Contain…
5. Window Box Planter
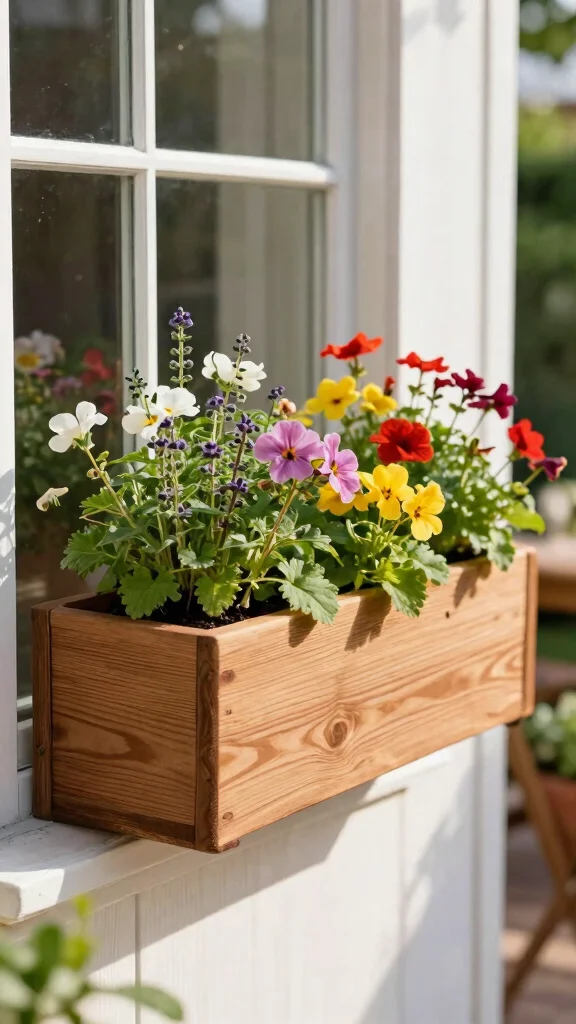
Short on space but want to enjoy some greenery? A window box planter is the perfect solution! Use your windowsills and balconies to create a vibrant display of flowers or herbs visible from both inside and outside. Craft a narrow wooden box that fits snugly under your window for maximum effect.
Begin by measuring your window accurately and selecting rot-resistant wood for longevity. Don’t forget to drill small drainage holes in the bottom.
Here’s how to make your own window box:
– Measure your window to ensure a proper fit.
– Choose rot-resistant wood for durability.
– Drill drainage holes for water management.
– Plant a mix of flowers and herbs for beauty and utility.
A window box not only brightens your home but also invites nature in, creating a welcoming atmosphere!
Fun fact: A 24–36 inch window box planter fits most sills and can grow a surprising mix of herbs and blooms. Measure accurately, select rot-resistant wood, and drill tiny drainage holes to keep plants thriving.
Window Box Planter
Editor’s Choice
Miracle-Gro Organic Outdoor Potting Mix – Plant Soil for Outdoor Contain…

4 Pcs Adjustable Window Box Brackets, Universal Steel Hanging No Drill P…

Furinno 2-FG16450 Tioman Hardwood Flower Box, Two-Pack, Natural
6. A-Frame Planter Box
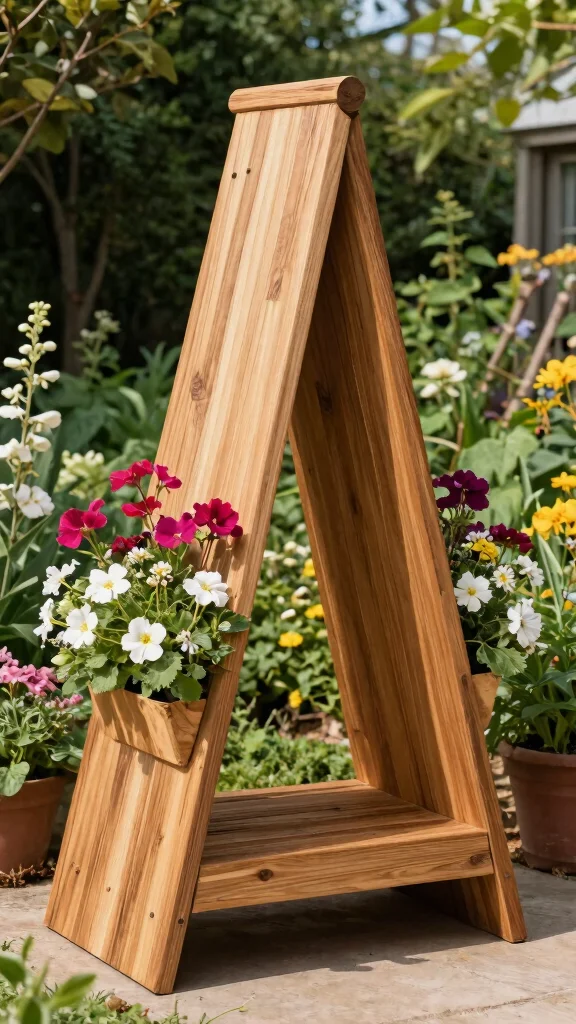
Looking for a stylish way to garden in limited space? The A-frame planter box design is both modern and functional. This structure features multiple planting areas while occupying minimal ground space, making it ideal for various flowers and herbs.
To create your A-frame planter, build two triangular frames and connect them at the top. Attach planter boxes to both sides for a beautiful display.
Here’s how to craft your A-frame planter:
– Construct two triangular frames securely.
– Attach boxes to both sides for planting.
– Ensure stability by securing it to the ground.
– Select a mix of plants with varying needs.
This planter will surely become a standout feature in your outdoor area, combining style and functionality!
A-Frame Planter Box
Editor’s Choice
Garden Tools Set, 3 Pack Heavy Duty Gardening Tools Set Include Garden S…

Miracle-Gro Moisture Control Potting Mix – Plant Soil For Container Plan…
Yaheetech 8×2ft Wooden Horticulture Raised Garden Bed Divisible Elevate…
7. Hanging Planter Box
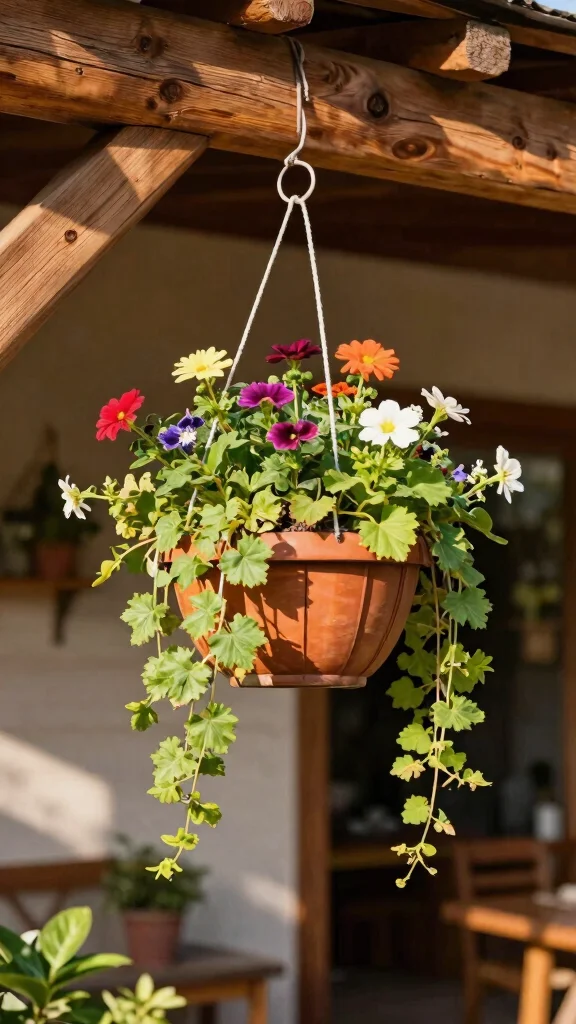
Want to add a unique twist to your gardening? Consider a hanging planter box that elevates your plants and adds charm. This design allows you to suspend boxes from ceilings, walls, or railings, creating a beautiful display while saving ground space. It’s perfect for trailing plants like ferns or cascading flowers.
To create your hanging planter box, opt for lightweight wood for easier hanging. Incorporate sturdy chains or ropes and select plants that thrive in elevated positions.
Here are some steps to follow:
– Use lightweight wood for easy handling.
– Incorporate strong chains or ropes for hanging.
– Select plants that trail for visual impact.
– Hang at varying heights for added dimension.
This planter box not only saves space but also transforms any garden or patio into a delightful oasis!
Hanging Planter Box
Editor’s Choice

Lilybud–lily Plant Hanger Indoor Outdoor, 16″ Large Hanging Planters fo…

CEWOR 4pcs Fake Hanging Plants, String of Pearls Artificial Hanging Succ…

ZeeDix 4 Pack, 24 Inch Hanging Basket Chain with Hooks, Black Metal Plan…
Conclusion
Creating your own planter boxes can bring joy, beauty, and freshness to your small outdoor spaces.
These seven simple designs not only cater to beginners but also offer fun projects that will make you feel accomplished as you watch your plants thrive.
So grab your tools and get started on your DIY planter box adventure!
Note: We aim to provide accurate product links, but some may occasionally expire or become unavailable. If this happens, please search directly on Amazon for the product or a suitable alternative.
This post contains Amazon affiliate links, meaning we may earn a small commission if you purchase through our links, at no extra cost to you.
Frequently Asked Questions
What exactly are planter box plans and how do they help beginners tackle small-space gardening?
Planter box plans give you a ready-to-build blueprint, perfect for beginner gardening projects and your first DIY planter box. For tight spaces, pick a vertical planter box design to maximize growing area without crowding your balcony or patio.
How to start: choose one of the 7 simple plans, gather basic materials like exterior plywood or cedar, a drill, screws, sandpaper, and exterior sealant, then follow the step-by-step instructions. Keep drainage holes in mind so roots stay healthy.
Tip: look for easy garden designs that don’t require specialized tools—perfect for newbies.
Which of the seven planter box plans is best for vertical setups in very small spaces?
For vertical setups, pick a plan that builds a tall, slim, modular box you can stack or hang along a wall. This keeps footprints tiny while giving you multiple planting levels.
Look for plans labeled as vertical planter box designs or that emphasize stacking, ladder-style, or corner solutions. With proper drainage and a weatherproof finish, these wooden planter box ideas shine in balconies and window boxes.
Pro tip: measure your space first, then choose a plan that fits height and width without protruding.
What tools and materials do I need to start a beginner-friendly planter box project?
You can keep it simple: a saw or handsaw, drill, screwdriver, measuring tape, square, sandpaper, and exterior-grade screws. For materials, pick weatherproof wood like cedar or treated pine, exterior-grade screws, waterproof sealant, and a shallow liner or landscaping fabric for drainage. Don’t forget a drill bit for drainage holes.
That’s all you need to begin one of the planter box plans and get your DIY planter box built in under a weekend.
Tip: choose a plan that uses common lumber widths to simplify cutting.
How should I maintain and protect a wooden planter box to ensure it lasts in outdoor conditions?
Start with a protective finish—seal or paint with exterior-grade sealant to resist moisture. Re-seal every season or two, especially in wet climates, and check for loose boards or screw corrosion. Use proper drainage and avoid waterlogged soil. Clean out compost debris and refresh soil annually.
These outdoor gardening tips plus regular maintenance extend the life of your wooden planter box ideas and keep your greens thriving.
Tip: place on a slightly elevated base to prevent ground moisture from breaking down the wood.
Can I customize the plans to fit specific plants or container sizes on a balcony?
Absolutely. Measure the containers you want to host, then adapt width, depth, and height of the planters accordingly. Use liners and drainage holes to accommodate pots and compact root systems, and choose plant pairings that suit sun exposure and your climate. These easy garden designs work great for beginner gardening projects who want to tailor a DIY planter box to their space.
Pro tip: keep each box shallow if you’re growing shallow-rooted herbs or greens, and deeper for root vegetables.
Outdoor gardening tips: consider modular designs so you can remove or reconfigure boxes as your space changes.
Related Topics
planter box plans
DIY planter box
beginner gardening
small space gardening
wooden planter ideas
outdoor gardening tips
easy garden designs
vertical garden
easy projects
container gardening
beginner friendly
home gardening